Showing posts with label Art Process. Show all posts

Monday, October 1, 2012

Baby Steps (Let's Get this Mini-Comic Started)

A couple of weeks ago I had the pleasure of seeing Gilbert and Jaime Hernandez at The Free Library of Philadelphia. It was a great event. Los Bros Hernandez hadn't been to the Free Library since the early 90's and I had never seen or heard them speak before. They are legends in the comic world, and I wanted to hear what they had to say.

 What I loved most was that they didn't actually say all too much, and they explained why. As they clicked through a power point presentation up on the projector screen, they talked about where they were in their careers, what had happened to them in real life, what was happening to the characters in Love and Rockets. They explained their journey, but they pretty much reject the idea of any in-depth critique or examination of their work. They are the first to admit that a lot of their work came from an idea of "I want to see these two characters together. I want to see what happens" (I am paraphrasing despite my use of quotation marks). The trained literary critic inside me wanted to yell, "Bullshit! You must have had some message, some argument, some meaning in mind!" But to be honest, I myself often write and draw not knowing what will happen in the end. It is sometimes better to trust the dark side of the moon of your brain. Let your subconscious do some work instead. Anyway, it was a pretty awesome presentation if only because the messages I took from it were "MAKE COMICS!" and "TELL STORIES!" and "FOCUS ON CHARACTERS!"

Afterwards, when Gilbert and Jaime were signing books, I specifically asked what kind of pencils, brushes, and inks they used. Jaime does not use a non-photo pencil or a brush, which surprised me. He is a nib man. And graphite --> ink. And both Hernandez Hermanos use Speedball brand Super Black ink. So, I wanted to make a 2-3 page comics about what happened that night, what I remember, and what I walked away with. My comic art process in this post is the first step to making that mini-comic. It is kind of a dry run, kind of a preview, kind of practice just to keep sketching, keep inking, keep scanning as much as I can.
simple pencil sketch.
Used a G nib and Speedball super black ink.
Added some shading using cool grey Prismacolor markers.
Colorized the grayscale image and added some halftone shading using Paint Shop Pro.
Finally added some narrative text using a box as well as text directly into the image.
So, I do plan on expanding this out to a 2-3 page comic, so stay tuned to watch my progress. Or don't.


Tuesday, May 15, 2012

"Bear Under a Tree" (Process)

Here is another Storify story using tweets to show a process of doing an illustration.

Wednesday, April 4, 2012

Duke and O'Roark and The Sea Monster

More Duke McMahon and more sea monsters?  I first showed a pencil sketch of Duke and O'Roark and a giant octopus/squid months ago on my Tumblr site http://sketches.inkpuddle.com.  And apparently, my mind still wanders to sea monsters, as I revealed in my recent sea monster color print (you can see an additional sea monster at my Tumblr site [see link above] ).  Well, I dug up the drawing and got to work inking it.  I added some digital colors, but this leads me to believe that I am bad at coloring and probably need to buy a digital table like an Intuos for me to do it well.  The funny thing is, I forget what I had the characters (and the walkie-talkie) saying in this 1-panel comic.  I tried looking for the scrap of paper I wrote the dialog on, but to no avail.

Here are the progressive images.

Half inked
Fully inked
Colored in Paint Shop Pro (quickly)


Monday, February 27, 2012

Architecture Drawing

It was in the first house I lived in that I wanted to be an architecture (which means I was 9 years old or younger).  I loved playing with legos and Lincoln Logs and making forts, and I loved drawing houses and floorplans, so being an architect seemed to fit.  Because I was young, I was seemingly turned away from architecture when I found out that it involved more than just drawing pictures of houses.  You had to know math and engineering and you had to work with contractors.  It lost its charm.  Knowing what I know now (including what I know about myself), I think I would have really enjoyed being an architect, because on top of the artistic design aspect of the job, there is clearly the need for problem solving, which I very much enjoy.
Pueblo House drawing done in 5th or 6th grade

When I was sixth grade, I encountered a substitute school teacher by the name of Ira Shander.  Since he was an artist, he would include art lessons when he substituted for the day.  I remember we were drawing the Kremlin, and he liked what I was doing.  He later gave me some postcard and greeting card examples of his work where he would essentially draw architecturally interesting homes for rich people.  Think rich people living in colonial houses from the colonial period throwing parties or just sending Christmas cards with their fancy rich houses drawn on the card via a commissioned illustration.  He also did historical buildings like those in Independence Mall as well as historic lighthouses.

Fast forward to now, and my girlfriend is what you might call a lifelong student of architecture, with a penchant for Victorian homes. Thus, my latest project.  I didn't want to draw a random Victorian house that I saw.  I don't mind drawing from life, but I much more enjoy creating myself.  So, instead I looked at Victorian architecture in pictures and in person, took notes, and got familiar drawing their forms.  So, I essentially made a Franken-house.  This is a made-up house, one that does not exist anywhere.  Perhaps that is for the best since I don't know much about structural integrity.  One thing was for sure--I had to make sure it had a mansard roof.  I also liked the idea of tower/turret addition.  I started off with a regular roof and changed it to an onion style roof.  Here are some of the preliminary sketches in my small sketchbook.

The basics and some of the details are right there in the thumbnail sketches, including my plan to show the front gate and surrounding flora.   Here is the first draft.  I have laid down pretty much most of the pencils or at least pencils for guidelines.

Now here is the top half of the house with mostly finalized pencils.  I like how this is progressing, and I am excited to see this thing inked.  On thing that I changed was how I detailed the roof.  I started off drawing an open, angled backwards "L" shape for the shingles.  I changed this to individually drawn and layered shingles, and I think this was a big improvement.

As you can see, the shrubberies I added were pretty much blobbish guidelines.  I inked in the leaves and shadowing freehand.  This is a piece that clearly could have gone on for much longer.  I don't like drawing clouds, so I didn't.  I could have inked in every pebble of every stone lining the path, but I also wanted to vague spaces so things like the footpath wouldn't be distracting.  Here is the almost final product.  I actually added gray ink shadow lines to the piece as a final touch and something that would make it unique and not what I have scanned or what I will turn into a print.

I plan on making this into a card product and posting it to an Etsy shop.  I will update this post when that happens.  I may also color it in and make a print out of it.

Monday, January 9, 2012

Twelfth Night (Malvolio)

Trying to keep to one of my artistic New Year's resolutions, here you have my attempt to do a character illustration for Malvolio from Shakespeare's Twelfth Night.  Of course, I have to start off with some preliminary sketches.
Some pre-lim sketches

I knew I wanted a longish rectacular head, and hunched yet gangly body type
I wanted to backwards engineer this a bit.  Malvolio is kind of dour, stick-up-his-butt servant character who is tricked into thinking that his employer (Olivia) is in love with him.  In a falsified note he conveniently finds, Malvolio is prompted to wear yellow stockings and smile in order to please his admirer.  So, of course, prior to this Malvolio must be a frowner, and he has to already be wearing stockings of some kind.  He also goes crazy later on in the play, so I wanted pre-Malvolio to be a very stuffy, buttoned-down kind of guy: tightly tucked shirt, pomade in his hair, etc.  So, when he goes nuts, his clothes can go haywire as well as his hair and his whole demeanor.

Here is when I sketched it out in blue pencil.

and then inked.

At this point, I need to figure out whether I want to add substantially to this sketch with more solid black shadowing or if I want to use watercolors and color it in that way, or if I want to add all color with the computer.  I definitely want color, though.

Thursday, October 13, 2011

A Bear with a Book (Making a Book Review Graphic) [Process]

So, like most drawings I do, this idea started off as a thumbnail sketch in my mini-Moleskine notebook.  I knew I wanted to start adding full-fledged book reviews to this blog, and to that end, I felt I needed a Book Review graphic to use as a header for each review I did.  Since I wanted to review graphical and illustrated books, I wanted the graphic to have an illustrated look to it.  So, I thought a bear with a book.

I have been in the habit of drawing and then inking illustrations on 11"x14" bristol board and sometimes larger sizes of bristol, so I thought I would take the same approach.  I sketched out the drawing, left some room for improvement and started inking.

Unfortunately, I ran into several problems.  First, because of old age or improper cleaning or humidity, my pen nibs were acting up.  The ink was not flowing, I was using too much pressure, and I was not getting the line widths and textures I was looking for.  I also spilled ink all over my drafting table, which is a super rare occasion, which then makes it ironic considering I call this blog The Ink Puddle.  Again, I didn't like the look, the lines, nothing.  I was putting this on the shelf when I spent a lovely and magical day in Philadelphia.  Two things changed how I did this illustration.  The first was seeing Brian Selznick, author or The Invention of Hugo Cabret and most recently Wonderstruck.  I will get more into his appearance later, because it is worth expanding my description.  I asked Selznick what supplies he used for his book illustrations and he said he drew on watercolor paper with a mechanical pencil, mostly with HB softness.  So, this is what I tried to do.

So, like Selznick, I wanted to use a mechanical pencil on watercolor paper.  The second important thing that happened that day was seeing extremely detailed illustrations by Maurice Sendak at The Rosenbach Museum.  I was a little shocked at how tiny some of the drawings were.  I didn't think I even owned pen nibs fine enough for the lines I was seeing.  But I was willing to give it a shot.

This kind of illustration work (very small and very fine lines) was kind of a homecoming for me.  I always favored smaller compositions with fine lines.  Thankfully, I had art teachers who forced me to get out of my comfort zone and to go big and bold with designs and tools.  When it comes to sequential art, I forced myself to use a brush and ink as often as I could.  I still mess up, I am still not as proficient as I would like, but I enjoy challenging myself.  But I have to say, working on a postcard size paper with fine pencil felt pretty good and comfortable.  Using only one softness, HB, I could vary pressure to get a couple gradation of shades.

Below is the final pencil composition.  The actual postcard looks much better.  I need a tutorial on how to scan pencil drawings effectively.  I need more help adjusting the histogram levels.  I am thinking I may try to take photographs of the postcard as well.  Something tells me the reflective bright light of the scanner will always wash out tones I want kept in.

The next time you see the image above, it will be changed a bit and formatted to be used in a Book Review graphic.  If anyone has hints and tricks for scanning pencil drawings, please let me know!

Monday, August 22, 2011

Changing Styles Halfway Through

I have been cheating with my sketchbook project.  Certainly not every day, and I am struggling to keep up with one a week, which is very disappointing, but I will muddle through.  The cheating comes in where I try to use my sketch as my daily sketch as well as an Ink Puddle posting, but in my defense, I really need to post more often, so I gotta do what I I gotta do, right?

Anyway, as I working on this sketch, it came to me that I could use it to illustrate a point about artistic styles and the need to sometimes change a style midway through a project.
This and other sketches at http://sketches.inkpuddle.com
I feel like I did a better job here.

I started off this sketch as a representational piece.  Like I have done with other sketches, I wanted to capture the likeness of the object.  I have done this with more success elsewhere.  With my sketch of Toledo (Roman knight of sorts), I tried to draw what I saw, which is to say, the statue of this knight.  And I think I did a pretty good job.  It is incomplete and I get a little stylistic with the lines, but overall, I think it looks like the statue looks like in real life.

When I started with the mug, I knew I was setting the standard high, because for me, drawing cylinder shapes (multiple rings or circles), getting their curves and proportions right, is very difficult.  Not for everybody, mind you, and I am sure there are tricks to doing it better, but I find capturing the curves and shadows of things like glassware to be very difficult.

So, as I continued drawing the sketch, and being disappointed with it, I decided to take the approach in a new direction. I decided I was going to be more stylistic with my lines, mimicking in a way the lines of van Gogh.  If I couldn't get the proportions and curves right, I would flood the piece with lines and curves, and be a bit more abstract, although abstract is not the right word.  Let's stick with "stylistic," because I shifted the focus of the piece from accurately representing the actual object in real life to creating a stylized beer mug object, with its own kind of presence.  "This is not a mug."  I added more and more lines, added yellows and light oranges to fill in the blank space.  In some previous sketches in this brown paper sketchbook (it's actually a Paperchase brand photo album with a heavy kind of craft paper), I left a lot of empty space.  Here I tried to fill as much of it as possible, even if it was with light yellows.  And then I added blocky, chunky yellow strokes as a kind of background / false horizon for the sketch.  Again, this was done as a kind of way of reinforcing that this was no longer a representational piece.

Clearly, this change of direction in style and purpose arose out of a failure of sorts.  I could not properly fix the curves and proportions to my satisfaction for it to be a well-done representational / only slightly stylized piece, so I went all the stylized.  And I am much more satisfied with its completion.  Cheating?  Taking the easy way out?  I don't think so, because I still worked on it to the best of my ability and to the point where I thought it was completed.

Saturday, July 30, 2011

Making a Postcard Art Feature Graphic (Process)

Another "feature" for the blog means another custom graphic needs to be manufactured.  A fellow artist friend of mine has been sending me postcards featuring his artwork.  He tends to throw away his artwork (crazy, right?), and I tend to keep everything, including the lint from my pocket.  So, it works out that I will be acting as a kind of archivist or curator of at least some of his art.  Here is how it started off.
Sketchbook page with rough drafts
I included the whole page, because I thought it was funny in what direction my brain was going.  The graveyard scene concerns my character of a zombie Shakespeare.  I was also working on a design for a baby bib for a friend's baby.  I am not sure where the bird comes from.  The bear is another bib design that I had done a while back.  And then there is the mouse holding a martini.  Mad Men inspired.  An odd 1950's Mickey Mouse turned corporate shill and playboy.  We'll see where that goes.  I was also trying to figure out what I wanted to call this postcard art feature.  Here is the really basic design up close.
That is some rough sketching
So, I transferred that idea into a blue pencil sketch.
Cleaned up non-reproducing blue pencil sketch
Then I inked it.
Inked using sumi ink with synthetic brush
Then I colored it.

And you will see the final graphic design when I post my first "Delivered by Art" feature.

Friday, July 8, 2011

Sad, Sad, Teddy Bear (Groan Folks Books Project)

So, here is another illustration from the Groan Folks book project I have been working on with my brother for the past two years or so.
Click on the pic to see a larger image
Here is something that perhaps other students of art encounter.  When I look at a fine example of a watercolor painting or even a fine example of a finished pencil drawing or illustration or ink sketch, it is not uncommon for you to see some remaining underlying pencil marks.  In some ways, I think this is intriguing because you can see how the artist began the work and you can see some of the drafting --> painting process at work.  Also, sometimes you can't really see the underlying pencil marks unless you get really close to the work, and if you have ever looked at a van Gogh painting up close, you will realize that the real effect of any work of art is not 2" away from the work or under a microscope, the real power is seeing it from afar or seeing it on an easel or a wall, anywhere from 3 to 20 feet away from you.  So, on one hand, I think underlying pencil strokes that show through in the final product are not only acceptable but awesome.

BUT, on the other hand, sometimes when I see my own underlying pencil marks, I get very frustrated and self-conscious.  First, because if I think the drawing or illustration is "done", then I don't particularly want to get into the process or erasing those lines and then trying to re-draw that exact shade of shadow or line and sync it up with the other lines and shadow in the piece.
Click to view larger and see the "early" pencil line(s) that remain
If you are not in the same frame of mind or month or year that you did that drawing, trying to go back and re-create the conditions in which you worked is like trying to put the toothpaste back in the tube.  When these drawings are printed on paper the size of normal children's picture books, you don't see the offending lines.  But I know they are there, and I am still unsure how I feel about them.  In one minute I say, "it's done, so it's done" and then I will turn around and say "that was just a draft.  I will re-do the whole thing over again."
You can see the "offending" pencil line here without even seeing the larger image.
Here is the dangerous part: I know about re-scaling images and Photoshopping images and printing resolution, so in the back of my mind I know that many imperfections magically disappear when scanned, processed, and printed, and this worries me that I will be (or have been) lazy in my efforts.  I think the key is to keep drawing, revising, more drawing, and do what feels right in the future in terms of fine polishing my pencil drawings, but it is a concern that continues to nag at my very soul.

BONUS BLOG POST!  What?  Bonus blog post?  That's right.  I am crossing my fingers, slapping myself in the face, shouting to myself, "You will sketch every day!" and thus was born The Ink Puddle Sketchbook @ http://sketches.inkpuddle.com.  We will see how long it lasts.

Wednesday, June 29, 2011

Making an Interview Feature Graphic (Process)

I would like to feature more interviews on this site, so I figure that I should have a custom graphic to have at the top of the interview.  That way someone visiting the site will know that it is an interview.  It's only polite.  I started off with a thumbnail in my Moleskine mini-sketchbook.  I knew I wanted it to resemble kind of a late night talk show, with Philly as a background, and something to be generic (in terms of being able to use for multiple interviews) but specific as well.
Step 1: Moleskine thumbnail (more palm-sized than thumbnail sized)

So, I wanted the guest to be a black and white outline: first to stand out against the color background, but also so it would prompt the question "who is the interview with this time?"  My cartoon interpretation of the Philly skyline, me in a suit with an old-timey microphone.
Step 2: Non-reproducing blue colored pencil sketch
So, I have made myself rounder and more cartoony.  My guest is no longer slumping and slouching like in the larger than a thumbnail sketch.  And I am looking more into the camera than at my guest interviewee.  Philly is more defined, but still inaccurate, which is fine by me. The blog has roughly a 575px width, and I wanted something like a 16:9 ratio, so I worked horizontally.  But I already have a problem: this is not 16:9 or even close.  This is more like a 4:3 ratio.  Not quite what I wanted, but I don't want to have to use filler to fill in the blank spaces if I go back and work wider.  I figure that the graphic will be bigger than I originally thought, or I will include text or something else on the right or left hand side, forcing it to be a wider, more horizontal graphic.
Step 3: Inked-in version of blue pencil sketch
So, with the exception of one of my thumbs, I like how this turned out.  No Wite-Out used to correct anything. I really like how the Blick "Wonder White" brush performed.  I will definitely be using it more often. Now on to the coloring process.

So, here it is.  I used more patterns than I originally intended, but I like how the wood of the table turned out. The pattern for the suit and the star pattern is kind of a cheat, but again, I like the results.  I still have to play around with making it more horizontally longer, maybe by adding something to the right or left border.  I don't want the graphic to overwhelm the text.  It is supposed to be a re-usable graphic for my interview feature, so it should be recognizable, but the point is to feature the interview.  You will see what I do with it in my next post when I feature an interview.

Wednesday, June 1, 2011

Creepy Basement

So, this is another piece from the Groan Folks project.  The whole work is about revisiting the creepy places that you grow up experiencing and sometimes seeing them in a new light (and sometimes not).  Basements are creepy.  The basements I grew up with had pipes and exposed beams and rust and some mold and wooden benches and shelves and all kinds of gnarly stuff.  And there was never sufficient lighting, which did nothing but cause even creepier shadows to play on the walls and among the pipes.
The basements I know also had breaker boxes with deadly warnings inside them.  So, this is where I started.  From there, it became a game of playing with shadows. If there was an opportunity to place something creepy or visually confusing in the shadows then I made it happen.  Below is a detail of this piece that shows some of the shadow play, but I could have easily zoomed in on other parts of this.  There is a shadow behind the pipe on the left that actually ties in with another figure in another illustration in the same book.  There is also a shadow hiding in the window in the upper right hand corner.

Above I purposefully went with three creepy characteristics.  The first and easiest to see is the shadow of the pipe helping to blow out the candle.  It is easy for a crusty, rusty, old-timey pipe to have a face-like shadow, so that was easy.  The second is the face in the pipe itself, in the bottom right corner.  I tried to make a pair of eyes and a nose with keeping with the shading I was doing.  The third, I kind of did by accident.  The black, gooey dripping from the pipe (left) seemed to me to be human in shape, kind of upside-down human stick figures, so I went with it.  The shading in the background uses pencil on its side, blended multiple times.  I then did a rougher kind of shading on the pipe and used a kind of Edward Gorey style lines for the breaker box.

Tuesday, May 17, 2011

Reading about Creating Art

I have been re-reading Chaim Potok's My Name is Asher Lev.  I have already come across some great quotes that I have tweeted on Twitter.  The first one was this: "I grew up encrusted with led and spectrumed with crayons.  My dearest companions were Eberhard and Crayola.  Washing for meals was a cosmic enterprise" (Potok 6).  We all have our favorite art supplies that we used as a kid.  I still have a penchant for Dixon Ticonderoga pencils, something about the green and yellow color scheme.  At the moment, I will choose the Staedtler Mars Lumograph pencils (blue with a black end) over most any.  Are they any better?  I am honestly not sure, but I like the way they look and how I can pick out my 2B's and 4B's quickly.  I don't like it when the softness is printed on the barrel of the pencil.

Potok also writes,
"Inside my room, I lay on my bed with my eyes closed and thought about the man from Russia.  I saw his face clearly: the nervous eyes, the beaked nose, the pinched features.  That face had lived eleven years in a land of ice and darkness.  I could not imagaine what it was like to live in ice and darkness.  I put my hands over my eyes.  There was his face, very clearly; not truly his face, but the way I felt about his face.  I drew his face inside my head.  I went to my desk and on a piece of blank white paper drew how I felt about his face" (Potok, 41).
I can really relate to this imagery.  I have said myself on this very blog that the drawings I make of myself and of other people are not from life studies.  First, my family, friends, and co-workers might find me a bit suspicious if I just plopped down next to them with a sketchpad, but also, I think there is something about capturing how you envision someone.  I rely heavily on my memory and what I see in my mind's eye.  It's not necessarily my POV as I saw it when it happens.  I often depict myself and another subject from a third person point of view, sometimes drawing things that I could not possibly have seen.

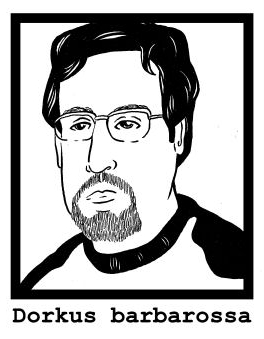
I also tend to use visual markers.  For myself, it's my glasses, my beard, and a swoop to my hair.  Certainly my body type and my typical wearing of either a button down shirt or a T-Shirt come into play, too.  For other people, I do the same, I take inventory of the visual markers.  It could be something they wear (glasses, clothing, etc.) or a hairstyle, or an exaggerated physical feature.  Sometimes I can capture an expression or a singular moment or a genuine likeness, but I am fine with "representing" someone with a caricature or a readable set of codes.  ITEM #1 (GLASSES) + SPECIFIC HAIRSTYLE = PERSON X.  I also liken it to how William Wordsworth characterizes poetry: "the spontaneous overflow of powerful feelings: it takes its origin from emotion recollected in tranquility."  Emotion recollected in tranquility in artistic form can be quite different than the immediate sketching of a subject.  When I am drawing someone from real life, it can be quite frenetic, eyes darting back and forth, pencil moving back and forth, trying to capture that moment, that likeness.  Erasing, more drawing, more erasing, blending, fine tuning.  Drawing a cartoon of someone or just a general likeness afterwards with the subject absent is much slower, easier, more deliberate yet relaxed.  Neither is a photograph.  Which is more accurate?
Vincent Van Gogh (Self Portrait) Art Poster Print - 13x19
The way I look at it, even the most famous portrait by the most famous and skilled painter is still a memory impression of the subject.  No living subject (read: human being) can sit perfectly still.  The light from the sun moves slowly yet constantly on the subject, shifting shadows and highlights.  An errant thought running through the mind of the subject can make subtle shifts in his/her emotional state and therefore how they look, how they are perceived, and what they project to the world.  Therefore, all portraits, all painting depicting something in real life, is sequential.  Light, shadow, the subject, the subject's emotions all change minute by minute and second by second.  One portrait captures an enormity of poses and facets of the subject, which culminates in one "impression."
Pencil and oil pastel on watercolor paper. From life, using a mirror.
"Stylized realism" ink drawing  done from a photograph.
Visual marker-based cartoon depiction of myself (glasses + beard + hair swoop + button down shirt = ME).

Staedtler Mars Lumograph Sketch Pencil Set of 12
Sources: Potok, Chaim.  My Name is Asher Lev.  New York: Anchor, 2003.